How to Create Map Using Leaflet.js, A Very Beginners Guide, Best Way to Figure Out
Written by Appsbd Blog. Posted in Javascript No Comments
Leaflet.js
Leaflet.js is currently one of the most popular mapping libraries. It’s a flexible, lightweight, and open-source JavaScript library for creating interactive maps.
Leaflet is a framework for presenting map data. The data, along with the base map layer, must be provided by the developers. The maps are composed of tile layers along with browser support, default interactivity, panning and zooming capabilities. You can also add more custom layers and plugins, along with all the mapping in Leaflet. This mapping library converts your data to map layers and has wonderful support, making it the first choice for most developers. It works really well across major desktop and mobile platforms, making it a perfect JavaScript library for mobile and larger screen maps as well.
In this tutorial, I’m going to show you how to create a beautiful and interactive map of the South Pacific with HTML, CSS and Leaflet that will highlight the most popular beaches. I collected the data from the TripAdvisor website and collated the top ten beaches of the South Pacific as rated by the Travellers’ Choice 2021 poll.
Have you seen some interesting online maps and wished to create one yourself? Follow along on this exciting journey as I show you how to plot a cool map and highlight the top ten beaches using Leaflet.
Creating a Basic Leaflet Map in Four Steps
The process for building a simple map with leaflet is straightforward. Some background knowledge of HTML and JavaScript is beneficial, but don’t worry if you’re a complete beginner. It’s quite easy with this JavaScript library, and I’ll walk you through each line of code as I create this stunning, insightful map.
Create a basic HTML page
To start with, I create an HTML page to render the map object. I then add a to hold the map and give it an ID like map to reference later. Next, I add some style details where I specify the width and height as 100vw and 100vh. This will make the map occupy the whole page:
            <!DOCTYPE html>
<html lang="en">
  <head>
    <meta charset="utf-8">
    <title>Leaflet Map</title>
    <style type="text/css">
      body{
        margin: 0;
        padding: 0;
      }
      #map {
        width: 100vw;
        height: 100vh;
      }
    </style>
  </head>
  <body>
    <div id="map"></div>
  </body>
</html>
Reference the files of the open-source Leaflet JavaScript library
Since I’m using the Leaflet library, I need to include the necessary JavaScript and CSS files of this library. You can download the files directly, use the JavaScript package manager (npm) to install the files locally, or use the hosted version from their CDN:
            <!DOCTYPE html>
<html lang="en">
  <head>
    <meta charset="utf-8">
    <title>Leaflet Map</title>
    <link rel="stylesheet" href="https://unpkg.com/[email protected]/dist/leaflet.css" integrity="sha512-xwE/Az9zrjBIphAcBb3F6JVqxf46+CDLwfLMHloNu6KEQCAWi6HcDUbeOfBIptF7tcCzusKFjFw2yuvEpDL9wQ==" crossorigin="" />
    <style type="text/css">
      body{
        margin: 0;
        padding: 0;
      }
      #map {
        width: 100vw;
        height: 100vh;
      }
    </style>
  </head>
  <body>
    <div id="map"></div>

    <script src="https://unpkg.com/[email protected]/dist/leaflet.js" integrity="sha512-gZwIG9x3wUXg2hdXF6+rVkLF/0Vi9U8D2Ntg4Ga5I5BZpVkVxlJWbSQtXPSiUTtC0TjtGOmxa1AJPuV0CPthew==" crossorigin=""></script>
    <script>
      // All the code for the leaflet map will come here
    </script>
  </body>
</html>
Note: the integrity attribute allows a browser to check the fetched script to ensure that the code isn’t loaded if the source has been manipulated.
Prepare the data
To plot any map, I require co-ordinate values like latitude and longitude. I collate the latitude and longitude for each of the data points from this site here. Moreover, for the Leaflet development, I also need the base layer, which I get from a site called OpenStreetMap.
Set up the Leaflet map
Now comes the interesting part of creating the map by writing some lines of code. You won’t believe how few lines of code are required to create fully functional maps with Leaflet. This ease of development, along with the fact that Leaflet is an open-source JavaScript library, puts it high on the list of mapping libraries.
So, to begin with, remember that everything in this JavaScript library is accessed by the letter “L”, and all the functions are extended through it.
Initialize the map
The first thing I do is declare the map variable and initialize it with the Leaflet map. The first parameter is the ID of the
previously defined. The second is where you want the centre of the map to be. The last is the zoom level. I’ve set the zoom to 3.5, but you can set it to anything you like.
I use these parameters for my map, but there are lots of different options available for setting the state of map, interaction, animation and events that you can check out here:
            const map = L.map('map', {
  center: [-29.50, 145],
  zoom: 3.5
});
Add the base layer
Next, I’ve added the tile layer, which will be the base layer for the Leaflet map. A tile layer is a set of tiles accessed over a server by a direct URL request. This tile layer adds the geographic boundaries to the map.
Be sure to include attribution text for this, as most developers forget to do that:
L.tileLayer('https://{s}.tile.openstreetmap.org/{z}/{x}/{y}.png', { attribution: '© <a href="https://www.openstreetmap.org/copyright">OpenStreetMap</a> contributors' }).addTo(map);
Add the default markers
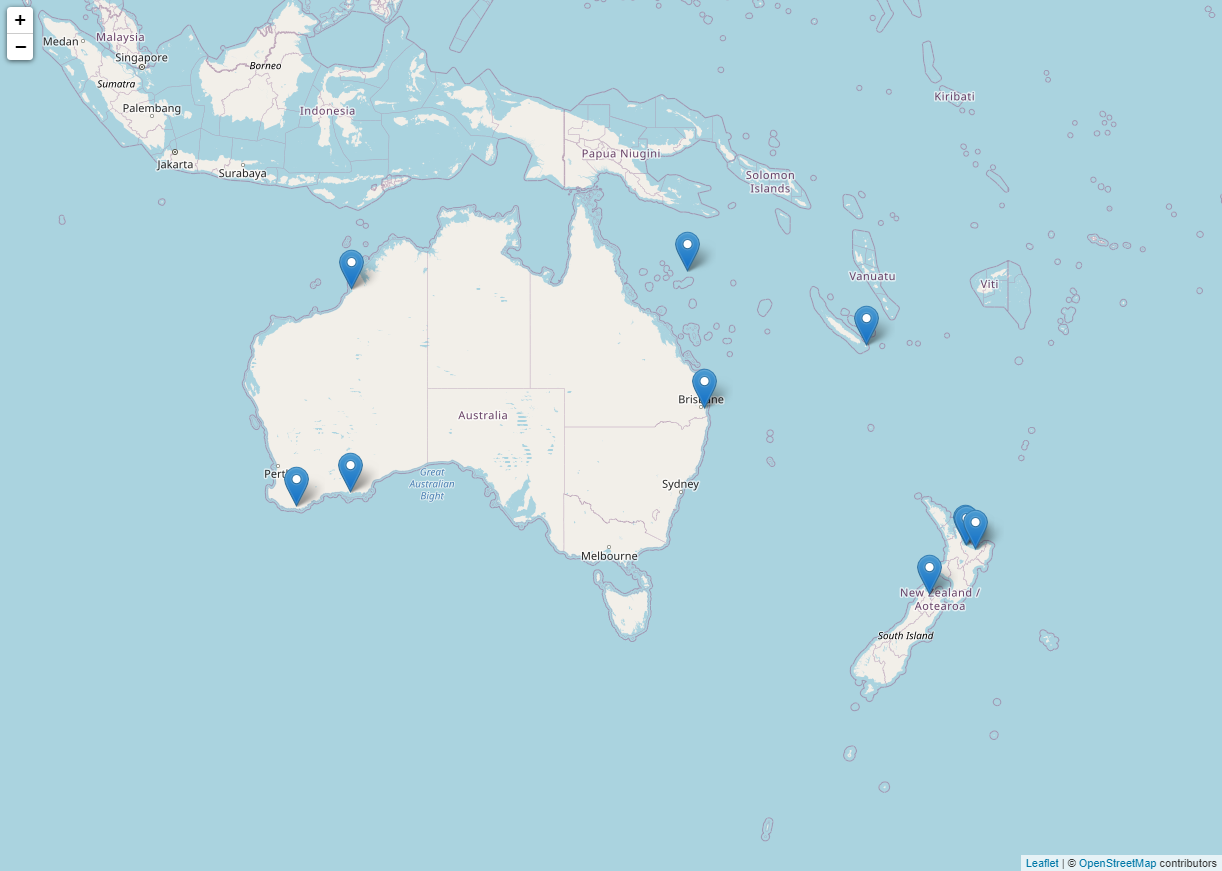
To indicate the beaches, I add markers. Leaflet provides this feature as default. Since I need to show ten beaches, I’ll add a marker each with the latitude and longitude values of the respective beach:
            const marker1 = L.marker([-37.699450, 176.279420]).addTo(map);
const marker2 = L.marker([-27.643310, 153.305140]).addTo(map);
const marker3 = L.marker([-33.956330, 122.150270]).addTo(map);
const marker4 = L.marker([-34.962390, 117.391220]).addTo(map);
const marker5 = L.marker([-17.961210, 122.214820]).addTo(map);
const marker6 = L.marker([-16.505960, 151.751520]).addTo(map);
const marker7 = L.marker([-22.594400, 167.484440]).addTo(map);
const marker8 = L.marker([-37.977000, 177.057000]).addTo(map);
const marker9 = L.marker([-41.037600, 173.017000]).addTo(map);
const marker10 = L.marker([-37.670300, 176.212000]).addTo(map);
Voila! An absolutely lovely and functional Leaflet map is all set up and ready. Wasn’t this Leaflet development a breeze?
The image below shows what this all looks like so far.
You can find the entire code in this Pen:
Customizing the Leaflet Map
One of the helpful features of the Leaflet JavaScript library is its facility for building basic maps quickly and also its having a load of options to customize the maps. So, let me show you four ways to make this Leaflet map more informative and aesthetically better.
1. Disable zoom with mouse scroll
One of the major desktop issues is the accidental scrolling of the map when trying to navigate through a page. To handle this, I modify the code where I had declared the map in the set-up stage. I’ll add the scrollWheelZoom attribute and set it to false, which ensures that the map can be zoomed only using the zoom buttons. I’ll also use a different way to set the centre and the zoom level that works efficiently and is more readable:
const map = L.map('map', {scrollWheelZoom:false}).setView([-29.50, 145], 3.5);
2. Add layers to the map
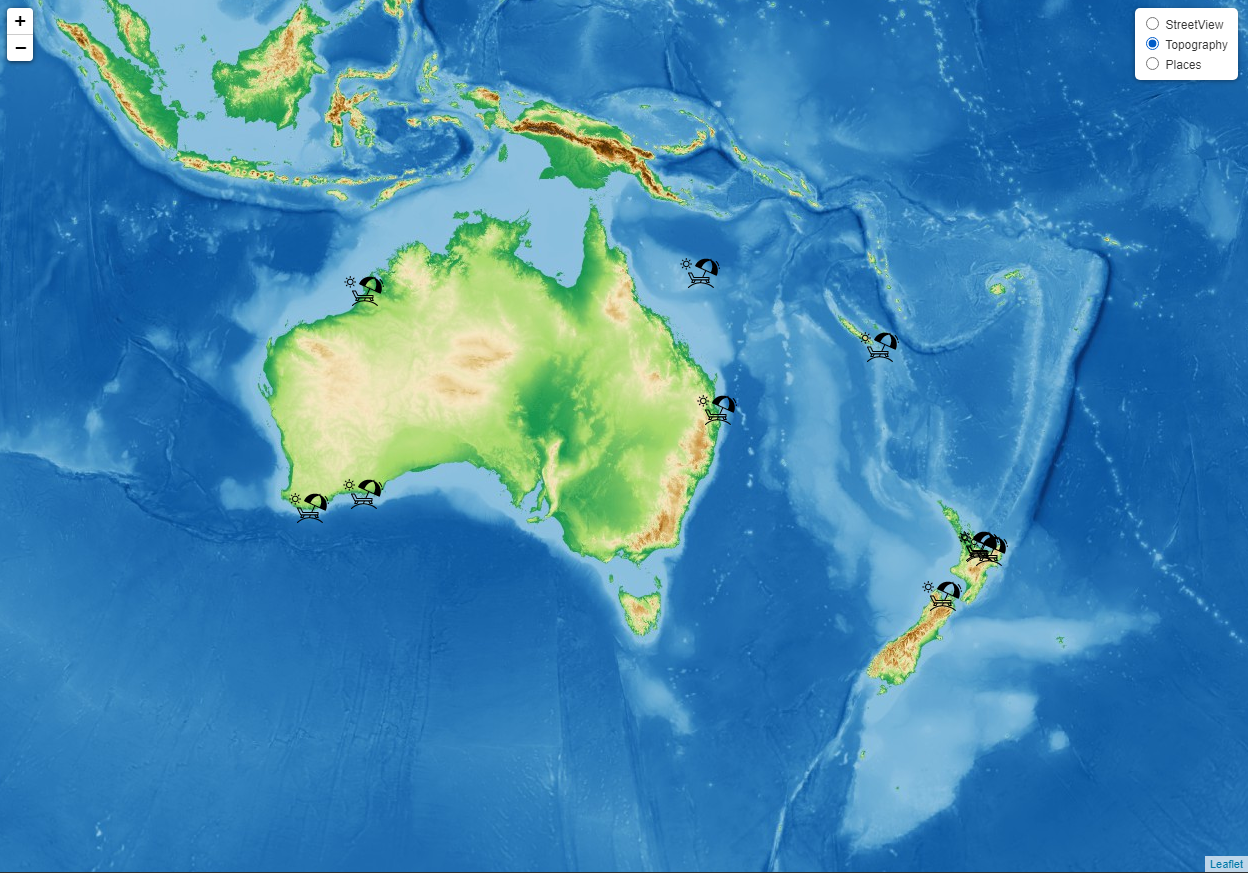
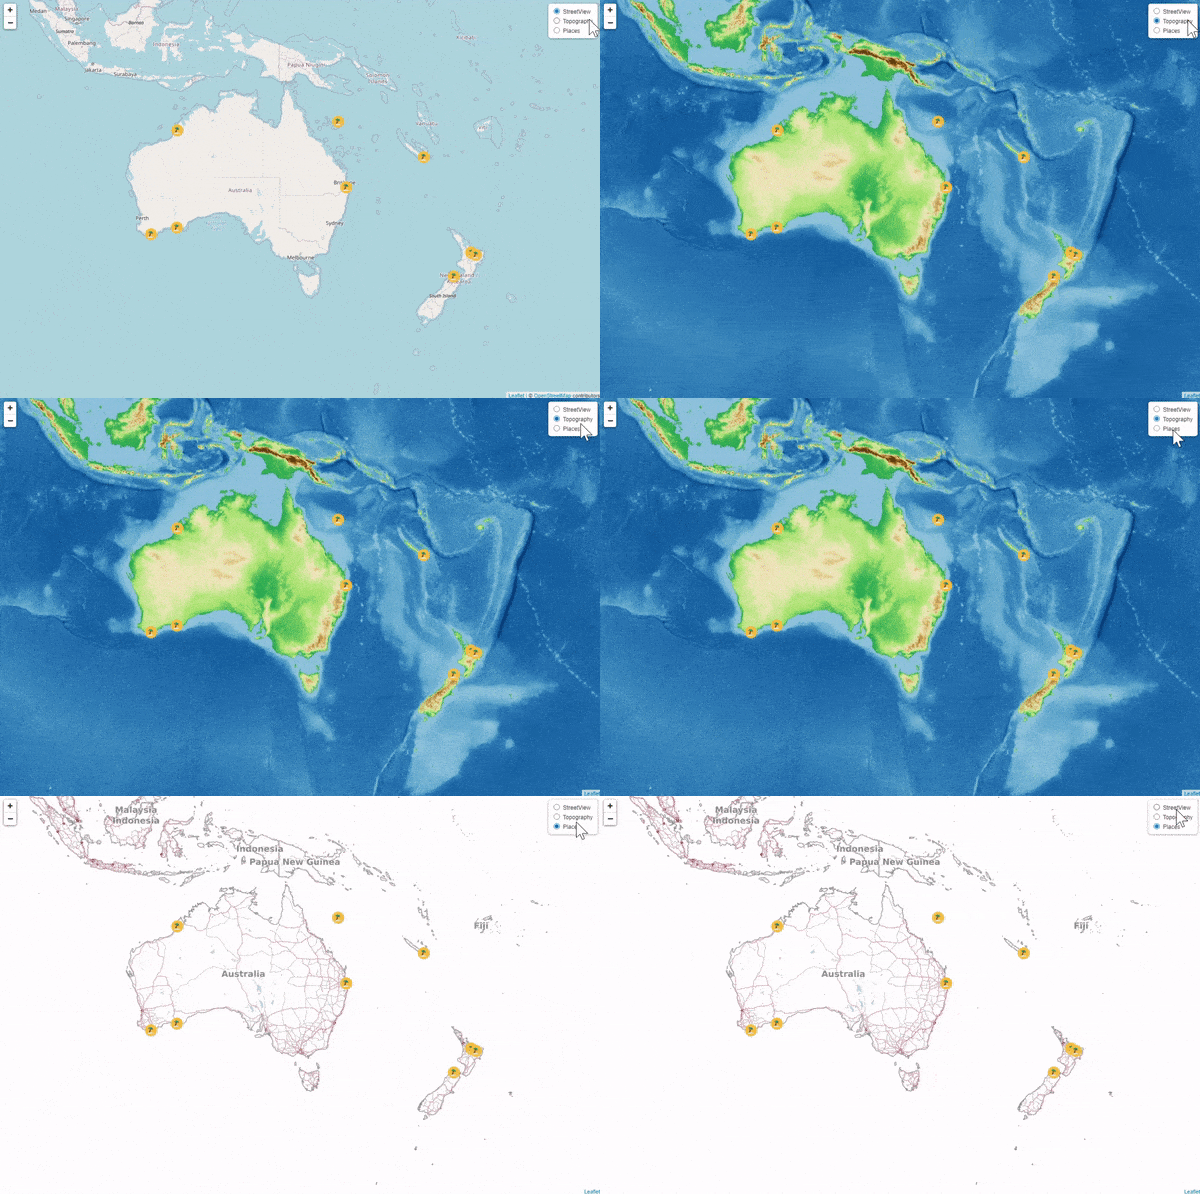
Another exciting and useful feature of Leaflet is the option to add multiple vector layers. Keeping the street view as one of the layers, I’ll add two more tile layers from a site that provides free web map service (WMS). I’ll add a topography layer and a places layer:
            const basemaps = {
  StreetView: L.tileLayer('https://{s}.tile.openstreetmap.org/{z}/{x}/{y}.png',   {attribution: '© <a href="https://www.openstreetmap.org/copyright">OpenStreetMap</a> contributors'}),
  Topography: L.tileLayer.wms('http://ows.mundialis.de/services/service?',   {layers: 'TOPO-WMS'}),
  Places: L.tileLayer.wms('http://ows.mundialis.de/services/service?', {layers: 'OSM-Overlay-WMS'})
};
Leaflet also provides the feature to give the user control over which layer to render. Using that feature, I’ll add an options menu button on the top right of the page that lets you select which of the three layers you want overlaid on the map:
L.control.layers(basemaps).addTo(map);
Lastly, I’ll set the Topography layer as the default layer to render. In the final version, I’ll revert to Streetview as the default option:
basemaps.Topography.addTo(map);
3. Customize the markers
The default marker is great for indicating a location, but custom markers give a personalized look to the map, and it’s quite easy to set it up using the Leaflet library.
To define an icon, I’ll need to specify the URL and size of the icon. I’ll download a free SVG icon and host it on my GitHub account, which provides the URL. I’ll set the size to 40, but you can keep it more or less.
Now, I’ll simply add this icon to each marker defined previously, and that’s it. All the markers indicating the beach are now beach icons:
            const basicBeachIcon = L.icon({
  iconUrl: 'https://raw.githubusercontent.com/shacheeswadia/leaflet-map/main/beach-icon-chair.svg',
  iconSize: [40, 40],
});

const marker1 = L.marker([-37.699450, 176.279420], {icon: basicBeachIcon}).addTo(map);
const marker2 = L.marker([-27.643310, 153.305140], {icon: basicBeachIcon}).addTo(map);
const marker3 = L.marker([-33.956330, 122.150270], {icon: basicBeachIcon}).addTo(map);
const marker4 = L.marker([-34.962390, 117.391220], {icon: basicBeachIcon}).addTo(map);
const marker5 = L.marker([-17.961210, 122.214820], {icon: basicBeachIcon}).addTo(map);
const marker6 = L.marker([-16.505960, 151.751520], {icon: basicBeachIcon}).addTo(map);
const marker7 = L.marker([-22.594400, 167.484440], {icon: basicBeachIcon}).addTo(map);
const marker8 = L.marker([-37.977000, 177.057000], {icon: basicBeachIcon}).addTo(map);
const marker9 = L.marker([-41.037600, 173.017000], {icon: basicBeachIcon}).addTo(map);
const marker10 = L.marker([-37.670300, 176.212000], {icon: basicBeachIcon}).addTo(map);
Check out how this personalized version looks here and play around with the code on CodePen.
This icon was just an example, so keep an eye out for a funkier icon as I change the custom marker in the final version of the visualization.
4. Add Popups
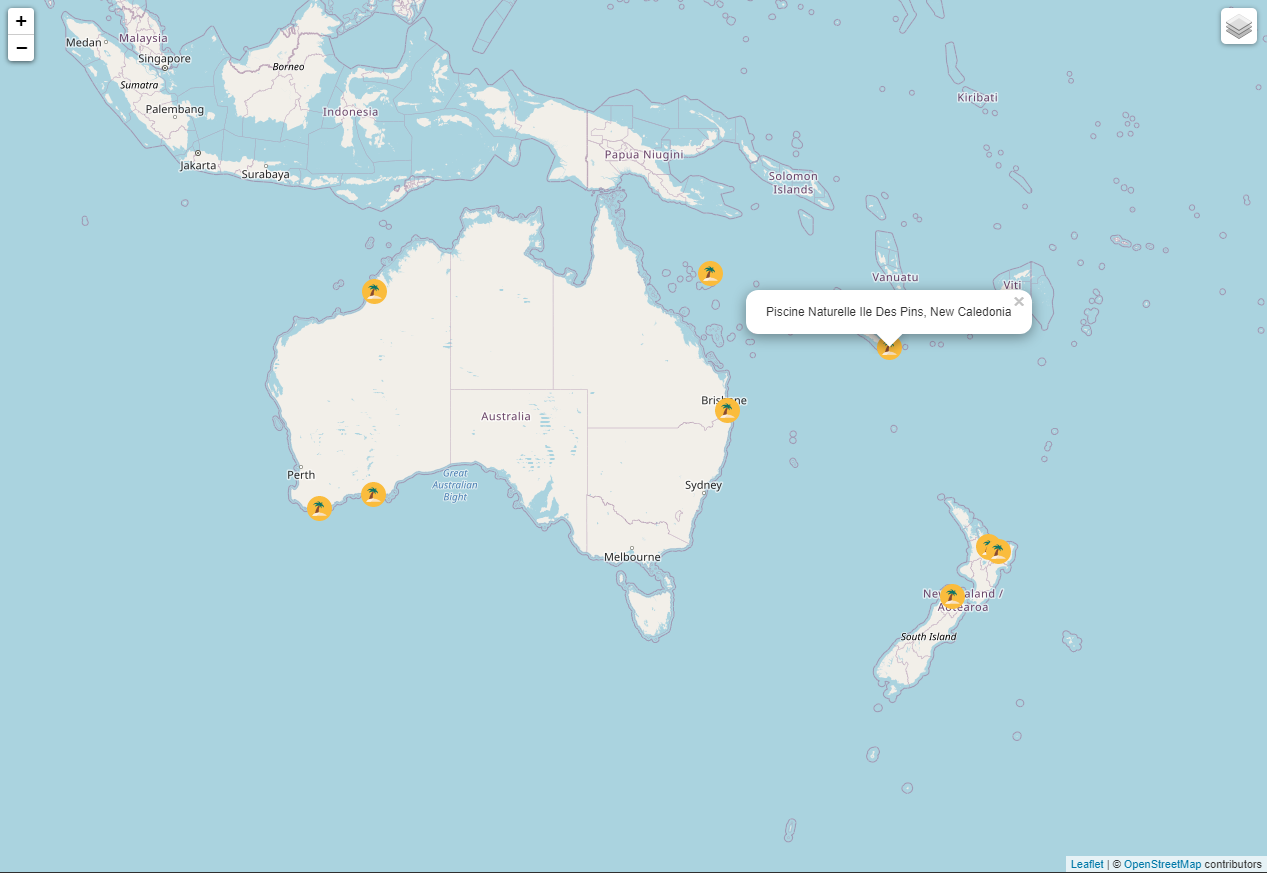
Like tooltips, pop-ups can pack in more information about the data. A popup in maps is displayed on clicking and can be customized to your preference. With Leaflet, the popup feature can be very easily added with a function called bindPopup.
Since we’re displaying beaches on our map object, I decide to show the name of each beach in the popup. I just add the text to the function and bind it to each of the markers:
            const marker1 = L.marker([-37.699450, 176.279420], {icon: basicBeachIcon})
    .bindPopup('Whitehaven Beach, Whitsunday Island')
    .addTo(map);
const marker2 = L.marker([-27.643310, 153.305140], {icon: basicBeachIcon})
    .bindPopup('Turquoise Bay Exmouth, Australia')
    .addTo(map);
const marker3 = L.marker([-33.956330, 122.150270], {icon: basicBeachIcon})
    .bindPopup('Cape Le Grand National Park Esperance, Australia')
    .addTo(map);
const marker4 = L.marker([-34.962390, 117.391220], {icon: basicBeachIcon})
    .bindPopup('Greens Pool Denmark, Australia')
    .addTo(map);
const marker5 = L.marker([-17.961210, 122.214820], {icon: basicBeachIcon})
    .bindPopup('Cable Beach Broome, Australia')
    .addTo(map);
const marker6 = L.marker([-16.505960, 151.751520], {icon: basicBeachIcon})
    .bindPopup('Matira Beach, Society Islands')
    .addTo(map);
const marker7 = L.marker([-22.594400, 167.484440], {icon: basicBeachIcon})
    .bindPopup('Piscine Naturelle Ile Des Pins, New Caledonia')
    .addTo(map);
const marker8 = L.marker([-37.977000, 177.057000], {icon: basicBeachIcon})
    .bindPopup('Ohope Beach Whakatane, New Zealand')
    .addTo(map);
const marker9 = L.marker([-41.037600, 173.017000], {icon: basicBeachIcon})
    .bindPopup('Kaiteriteri Beach, New Zealand')
    .addTo(map);
const marker10 = L.marker([-37.670300, 176.212000], {icon: basicBeachIcon})
    .bindPopup('Mt Maunganui Main Beach, New Zealand')
    .addTo(map);
And that’s a wrap! You can find the whole code on CodePen.
Other customizations with Leaflet maps
Apart from what I’ve shown you in this tutorial, there’s a plethora of customization options with Leaflet — such as adding shapes like circles or polygons, customizing the popup, and adding events. You can check out the instructions in the official documentation and the numerous examples provided by Leaflet.
A plugin opens a whole universe of customizations, and Leaflet, being open-source, has numerous third-party plugins that provide extended functionality to the original map. You can search for any plugin developed by the Leaflet community here. You can add more map tiles, pages, URL templates, PNG images, tile images, advanced zoom options and enhanced tile interactions with the Leaflet plugins. There’s also the option to use Google’s API for location and search.
Conclusion
As you can see, it’s super easy and quick to create interactive maps with a JS library like Leaflet. The installation is hassle-free, works efficiently, the code is readable, and all the mapping is conveniently handled by the library. It’s an excellent choice for creating mobile-friendly, interactive maps as well, since it works well with all mobile platforms. Along with great usability, there’s a whole lot of customization options supported by Leaflet. Please let me know if you have any questions or suggestions.
So, take a stroll on the beach or start plotting maps. Both options make for chilled out and fun activity!
For more exciting blogs please visit Appsbd. Find your Best Support Ticket Help Desk Software click here.
Are you frustrated? Don’t get any solution to license your software? Don’t worry appsbd providing the best license manager plugin for your software click here.

